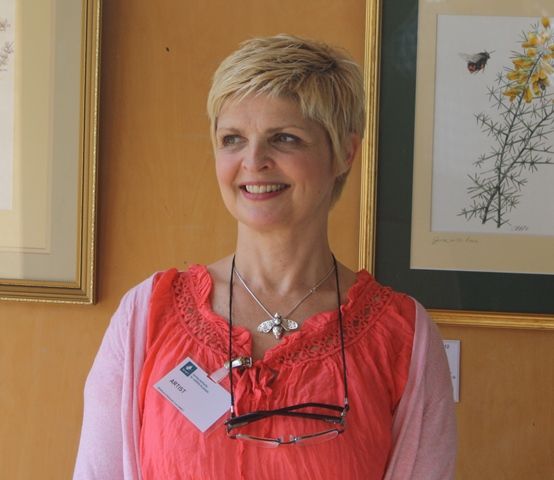
In the first of her painting tutorials for Writers & Artists, Cath Hodsman provides a step-by-step guide to drawing the early Bumblebee and the Alpina clematis flower.
For this, you will need:
Equipment:
- A selection of the smallest watercolour brushes 10/0, upwards.
- Watercolour paper. I like a slightly textured paper. Nothing too bumpy so that detail is compromised, but enough to give added depth to a painting. I use “Daler Rowney- Langton” A3 140lb 300g/m2 fine grain.
- Artists’ Masking Fluid
- Artists’ Scalpel
- Schminke watercolours
- Pentel twist – Erase 0.5 pencil
Colours:
Ultra Marine; Violette; Black; Cadmium Yellow; Light Lemon Yellow; Orange; Prussian Blue; Indigo.
For my first tutorial, I will paint what I love most – insects.
This is the picture I have chosen. I took it in my front garden last spring......It will be great to paint, because it shows the subjects clearly and is a nice simple composition - Nothing detracts from the bee and the flower.....it is the kind of arrangement that I love. I usually paint in watercolours. I use very small amounts of paint in order to get the detail and intensity of colour I require.
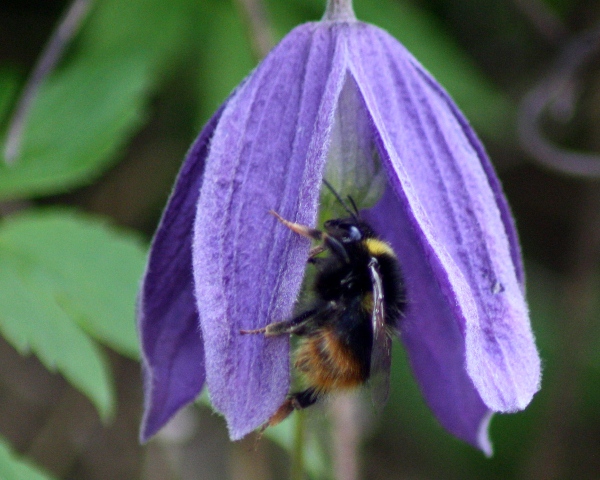
The subjects are also seasonal. The Bombus pratorum, or Early Bumble Bee is one of the season’s first emerging bees, but it can be seen throughout the summer months. The Alpina clematis is a great plant. It has dense growth and provides essential habitat for wildlife as well as nectar.
The first step is choosing the right photo. As an entomological artist, I like to pick out something that shows off the physiology of the insect in question. My work is a celebration of the smaller things in life and in order to do this, you need to accurately pick out detail. My clientele are also keen entomologists and if something is wrong, they will let me know! I have a camera that takes good macro photos, but I also use a photo editing programme to increase magnification if I need it. I don’t just work from photos. I have my own specimen collection and I also go out into the field and make sketches too.
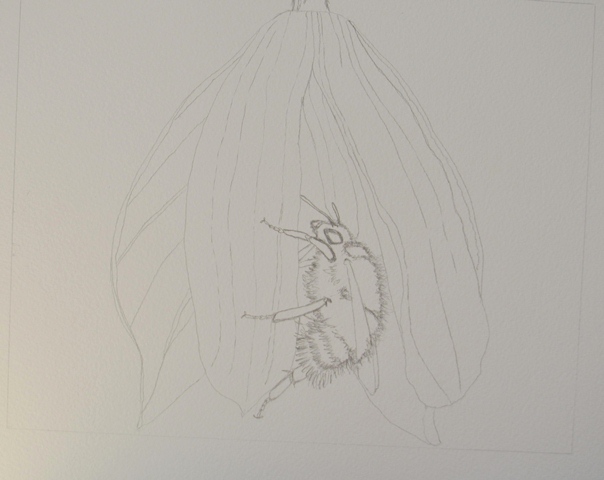
The second step is to draw the image. When you sketch out your initial outline, don’t worry about getting things wrong. Another artist once said to me, that “to get a right line, you have to do a wrong one” . That is very true, so don’t stress if you don’t get things right first time - just make sure you pencil things in lightly, so that it is easier to make any adjustments.
At this stage it is a good idea to mark out the main areas of colour, which will be a good guide for you when you do your first watercolour washes. It is also a great idea to mark out areas that you want to isolate from paint washes, such as white areas. For this, I use artist’s masking fluid. Paint on the areas that you want isolated and this can be left on the painting until you are ready to take it off and paint it in accordingly.
The third step - once the masking fluid has dried you are ready to apply the first watercolour wash. With watercolours, you usually go from the lightest colour and finish with the darkest. With this painting, I apply the first wash to the clematis. I use some of my larger brushes to apply it. A wash is important because it provides the base for the detail to go on later. What I am looking for here is areas of light and dark, light and shade - to emphasis the shape of the flower. The colour I choose is “Violette”, followed by a second darker wash of the same colour. Then I apply a wash of “Ultra marine”. It is important to wait until the first wash has dried before applying a second, or the first will run and you will end up with a sludgy mess. In addition, when applying washes, I do not apply the paint evenly. I like to leave areas with no paint on at all and also other areas where there is more paint applied. This gives the painting more depth.
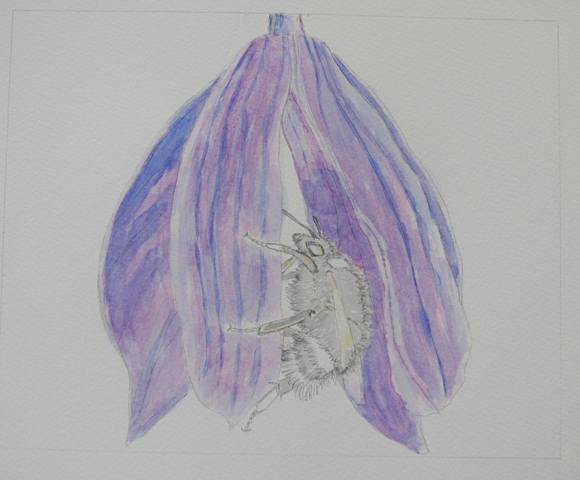
The fourth step – waiting for the washes to dry can be time consuming so, whilst you are waiting, you can start on the Bombus pratorum. I apply the first wash, using much smaller paint brushes, like a 6. I mix up a wash of “Black” and apply it to the relevant areas on the bee’s body.
TIP: when you are doing this, remember how the bee’s body fur grows and emulate this with your brush strokes – again, leave areas of white for depth.
With watercolour paints, it is all about the layers. To get a 3D effect, it is important to apply several layers of paint, using a different strength mixture each time. You need to look really closely at the body of the bee and be aware where the black body fur is darker and where it is lighter and make sure you copy that with the paint.
For the darker yellow areas on the bee, I mix up a wash of “Cadmium Yellow”. This is applied to the stripes on the bee’s abdomen. I then mix up a wash of “Light Lemon Yellow” to the stripe on the bee’s thorax. Using more “Cadmium Yellow”, I pick out the yellow areas on the bee’s legs too. To get the depth in colour for the stripes on the abdomen, I mix up a wash of “Orange” and apply that over the “Cadmium Yellow” . I use a fine brush for this. I ensure that, for each stripe I make, the colour at the top of the strip is stronger than the bottom, to help present the layered effect on this part of the bee’s anatomy.
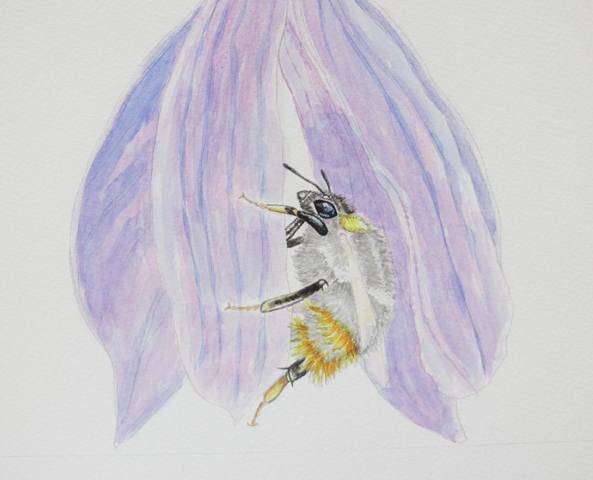
The fifth step – once you have a good covering of initial washes on the bee, you can start painting in some of the detail. I start with the legs. I also take off the masking fluid from all areas of the bee, apart for the wings, which I leave until later.
There is a touch of purple in the eye of the bee, from the reflection of the clematis flower. For this, I add “Violette.” At the point where the reflection is white, I use a handy-to-remember technique. Using an artist’s scalpel, I scratch away the paint, until I get to the white paper underneath. You need to be careful not to scratch away too much paper, but this is a great way to get highlights in a dark area, which can be difficult to achieve with watercolours.
The sixth step - now I go around the rest of the bee’s body with “Black” and paint in shadow on the legs and on the body. For this I use a mixture of different size brushes to get a 3D look to the fur.
Colour variation is important to spot and include. Down the side of the bee’s thorax and abdomen there is a hue of blue, so I need to make sure I incorporate this. I add a touch of “Prussian Blue” , which I can make darker later if I see fit. I then go around the bee’s body again, building up light and shade with the black, to emphasis body shape and texture.
The seventh step - after you are happy with the black, you can return to other areas. I top up areas of orange on the bees’ abdomen stripes and yellow on the thorax stripe. I also do the same for the orange on the bee’s legs.

The eight step - the next thing to paint in now is the bee’s wing. Take the masking fluid off and then look at the colouration and patterns. If you look closely at the photo, you can see that veins are purple, picking up the colour of the clematis. I use “Violette”, to pick these out. The wings themselves aren’t white. They are shades of blue and purple. I wash the other areas with a mixture of ”Violette” and “Prussian Blue”. The tips of the wings are also purple, so I add washes of “Violette” here too. To soften the outline of the wings, I take a little “Black” and apply it along the outline.
Finally, I apply a wash of colour where the wing is over the bee’s black fur. This will make the wing look transparent. There are also a couple of areas on the wing that are white, so I use the scalpel technique to scratch away the paint to give it that extra depth and realism.
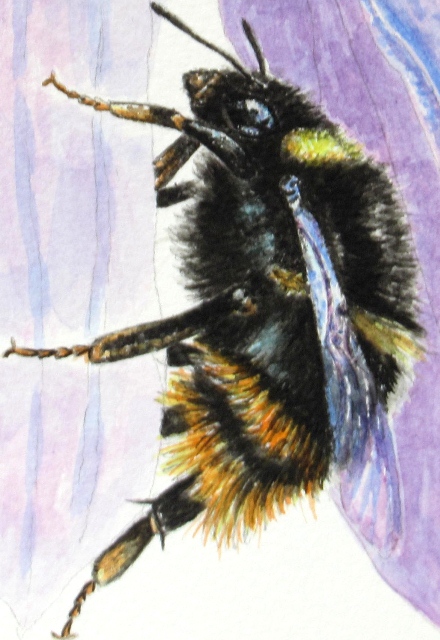
The ninth step - the bee is almost finished, so it is time to turn to the clematis. As it is a bigger area, I need to use my bigger brushes. I paint the darker petals first. I take “Violette” and apply a wash over the relevant areas on the petals i.e down the veins and in areas of shadow. Whilst these are drying, I start painting the lighter petals. I take “Ultra Marine” and apply a darker wash down each vein in lots of little dabs, to mimic the texture of the petals. Once a few veins are done, I use a light wash of “Ultra Marine” to wash out the dabs, just a little - This will make the marks look more natural. Using varying strengths of “Violotte” and “Ultra Marine” , I mark out other areas of light and shade on the petals until I have the effect I want.

The 10th step - to get the very dark shadow on the left hand petal, I use “Indigo”.
TIP: this is a colour that is great to use for shadows. It is dark without being as harsh as black, so it is much more realistic.
Using “Indigo” gives great demarcation to the shape of each petal on the clematis flower. Turning to the last petal, I paint the darker areas with a wash of “Ultra Marine”, to help emphasize the petal shape. Whilst this is drying, I paint in the fluffy edges to each petal, using “Ultra Marine”. Once the “Ultra Marine” wash has dried, I apply a wash of “Violette” over the darker areas to help emphasize the pinkness to the petal. As a final flourish, I go around the flower with “Indigo” and pick out all the smaller areas of shadow.
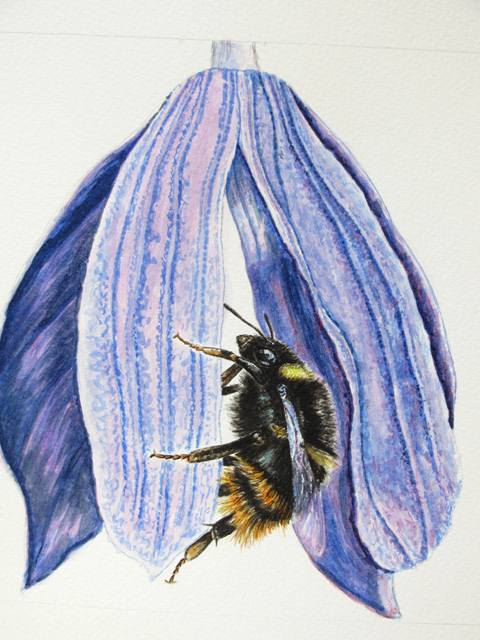
The final step - now I need to place the bee on the flower by painting in the shadow that it creates. I use “Indigo” again for this. Once this is done, I paint in the fine hairs on the bee’s legs. Where the hairs are in shadow, I use the scalpel technique to create a highlighting effect.
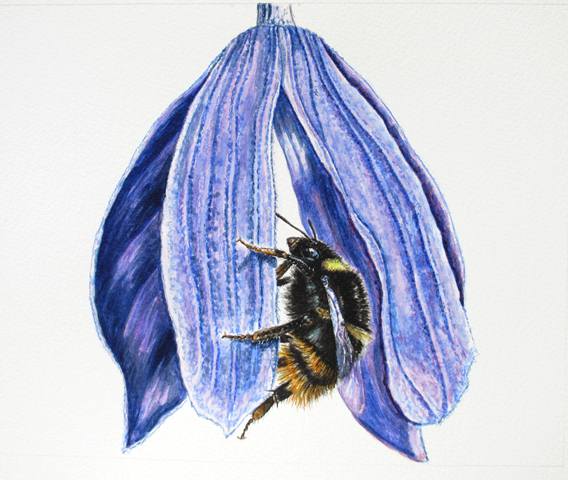
The painting is now finished - I hope yours turns out well, and celebrates the delicate beauty of the lovely early bumblebee!
If you found this article useful, you might want to take a look at:
Comments