In the second of her painting tutorials for Writers & Artists, Cath Hodsman provides a step-by-step guide to sketching the Scottish wildcat.

For this, you will need:
Equipment:
Daler Rowney Extra Smooth (Hot Pressed) watercolour paper 140lb 300 g/m2 16” x 12”
Pentel Twist-Erase 0.9 and 0.5 leads
2b graphite pencil
Putty Rubber
1” watercolour brush
Aerosol Fixative
Ruler
The second technique I would like to demonstrate is how I use graphite and pencil in my work. I love using them when I do mammalian work, because the graphite pencils help to get great fur texture.
I am currently involved in a project selling art online to raise money for the last of the Scottish Wildcats. There are only 35 true individuals left in Scotland and the project aims to set up a 7000 sq mile sanctuary for them in the West Highlands. They are one of the rarest wildcats in the world and need all the help they can get from whatever source is willing to offer assistance.
I have already completed one piece of artwork for this conservation project, so I thought it might be a good idea to do another for this tutorial, which will also raise money for the wildcat cause.
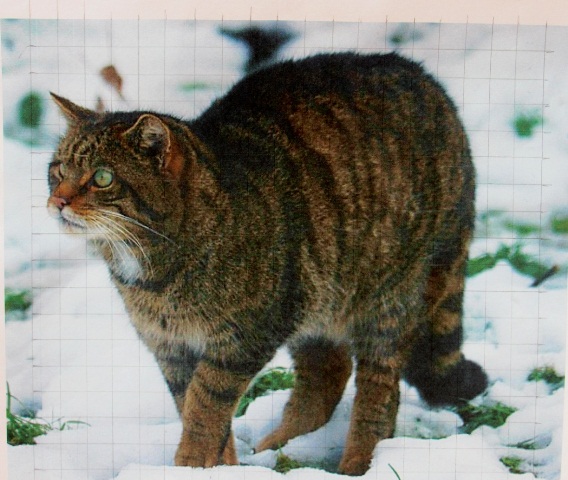
The picture I am working from is great because it conveys the character of the wildcat really well – mean, moody, curious and tough-looking! However, it is a grainy shot, so to help portray it accurately, I intend to use the grid method. The grid method enables you to get an exact replica of an image by guiding you through it square by square.
1st Step
To do the grid method, I need to draw a grid over the image and then transfer the same grid onto my sketch pad. The photo is split into 1cm x 1cm grids. For my piece, I want to make it slightly bigger, so I have made each square 1.5cm x 1.5cm. The paper I am using for this piece is much smoother than what I usually use. As the picture is not a close-up, I don’t want to compromise on detail, with paper that is too bumpy, so I am using Daler Rowney Extra Smooth (Hot Pressed) watercolour paper 140lb 300 g/m2 16” x 12”.
2nd Step
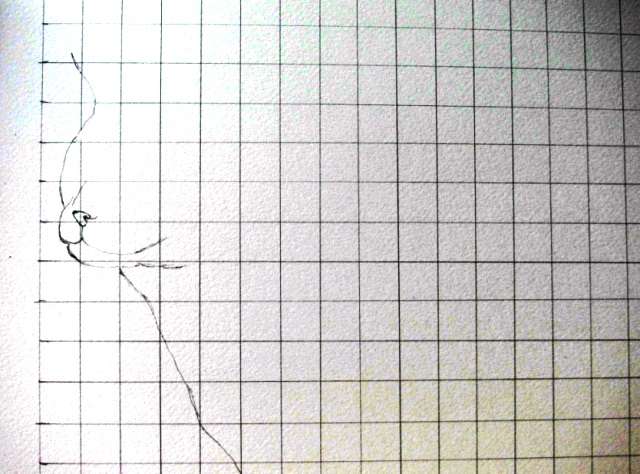
The next step is to go around and carefully mark out the outline of the cat. Once this is done, I can start to infill the detail by marking out the features on the face and the markings on the body. As the paper is smooth, I am using my fine line pencils, which are great for when I need to create detail.
TIP: Graphite pencils smudge very easily, so if you are right-handed, make sure you work from left to right of the picture, to avoid making a bit of a mess!
3rd Step
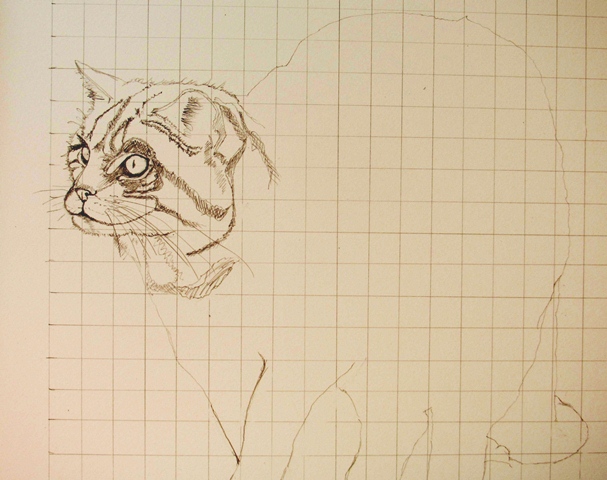
Once I have completed the outline, I start to infill details, such as the fur markings and the facial features. The face is always a very important part to get right, in order to get real impact. As this image is grainy, I make sure I use plenty of reference material to fill in any gaps. When drawing fur, it is always important to blend your pencil work. Blend light areas into dark areas very subtly, using light strokes of the pencil that emulates the right texture and also the same direction that the fur is growing in, to ensure a realistic effect.
4th Step
When you reach the outline of the cat’s body, remember to pay particular attention to the texture of the fur. Make sure you add the realistic and appropriate amount of fur on any given place on the cat’s body - the fur is a different texture at different points. For example, it is very coarse and short on the back of the cat and very fluffy and longer on the cat’s rear end.
TIP: As I draw, I rub out squares that skirt the outline of the cat, but rather than wipe the rubber shavings with my hand, which can cause smudges, I use a big soft 1” watercolour brush. This clears things up with no damage to the picture. The squares inside the cat simply vanish as I draw the cat in.
5th Step
Sometimes, it is fun to add your own character to a piece. To emphasize the wildcat’s tough personality, I add a couple of nicks out of his ear, to indicate past battle scars.
6th Step
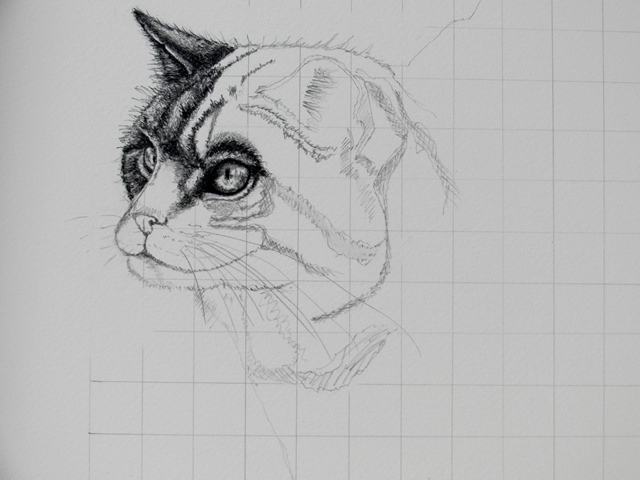
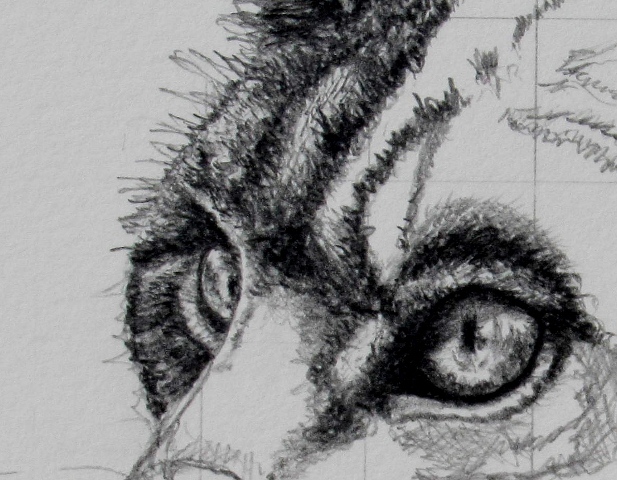
I mentioned previously that the face is the most important feature to get right - on the face itself, the most important feature to get right is the eyes. On this wildcat, the eyes are relatively distant from the camera, so detail is scant. I therefore add extra tiny dots and additional areas of shade, to emphasize the shape of the eyes and also to help bring out the animal’s personality.
In the photo I am using, the wildcat has obviously seen something that has taken its attention, so I want to bring this out in my piece too.
7th Step
To achieve added depth over the face, I use my graphite pencil on the darker areas around the eyes etc.
TIP: As I go around the cat’s face, I come to the whiskers. When drawing these, I make some whiskers thicker and darker and some thinner and lighter. This will help give depth too. I also make sure I draw the base of each whisker darker and thicker too.
Using my reference material, and the experience with my other piece, I know that the cat has prominent eyebrow whiskers, which are not apparent on this photo, so I make sure I add these too.
8th Step
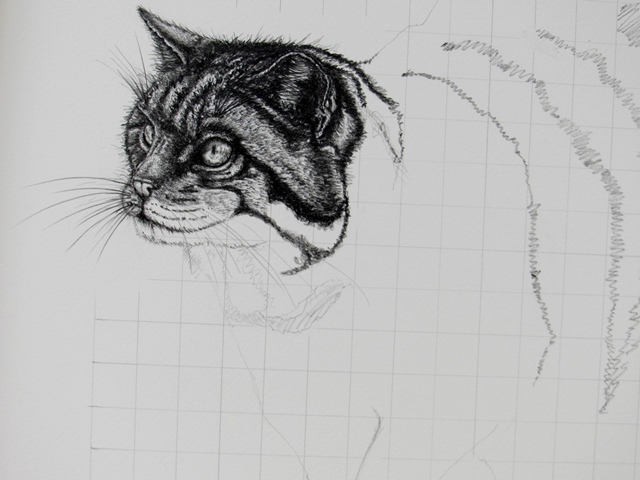
I continue around the cat’s face using the graphite for the shaded areas and the 2 finer pencils to gently blend in realistic hairs and more delicate shading....and before you know it, the cat starts to emerge!
9th Step
It’s all about the fur on this piece. The muzzle on the cat is very furry, with long, thick whiskers coming from it, so I need to take plenty of time here to ensure that the cat doesn’t have a bald nose!
10th Step
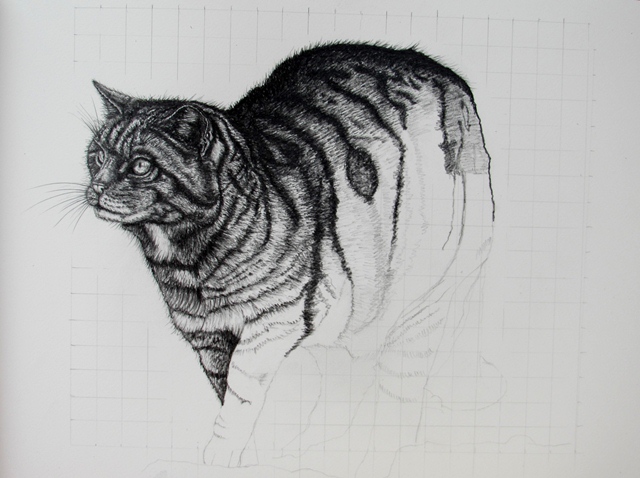
For me, the large areas of fur are the most challenging. It is difficult to make flat, dark areas look realistic, so I need to pay particular attention here. I use my graphite for the very dark areas on the cat’s stripes and as before, make sure I do plenty of intricate blending with my two finer pencils.
TIP: At this point, it is a great idea to take plenty of rests from the piece. It is easy to see nothing at all after a while, apart for stripes in front of your eyes!
Back to the stripes! Another thing I do when sketching in the cat’s stripes is to leave some areas where there is no graphite at all – this provides depth in an area which could otherwise look flat. At this stage, it is a matter of chipping away with the cat’s body, using all three pencils for the light, shade, and depth, remembering to blend each stripe in as I go - this can be quite monotonous work, but will be ultimately rewarding in the end.
11th Step
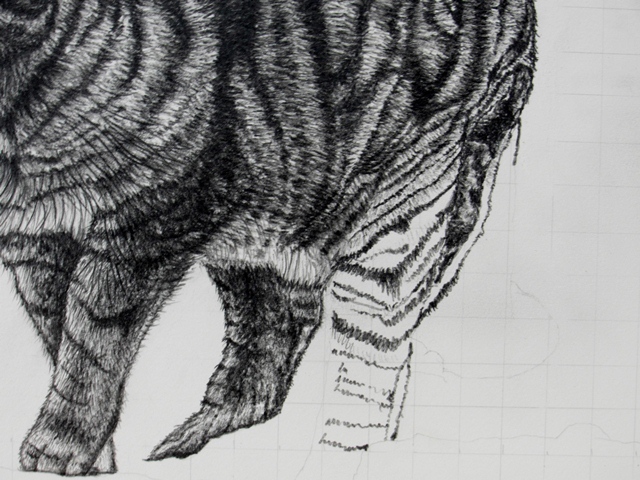
The last area I add is the tail. The Scottish wildcat is well known for its thick and impressive tail, which marks it out from domestic cats, so I pay particular attention to this to ensure that it doesn’t look like the moggy from next door.
Once I have finished the cat, I give it extra depth by stepping back and looking for broad areas of shade on the body. This can be seen on the rear of the cat, over the rib cage, around the front leg and so on. I take the graphite pencil and shade these areas in, which makes a huge difference to the realism and depth of the piece.
As a final flourish, I add the long singular hairs that grow close to its rear leg. I add these in with quick strokes of my pencil, in the same direction as the hairs are growing. I then add a little bit of background to place the cat in its environment, but nothing too much, as I don’t want to detract away from the central subject.
Before I can call it finished, it is important to remember to spray my work with Aerosol Fixative – this will “fix” the piece and prevent any smudging.

Well, that's it! A Scottish wildcat in all its glory. I hope you've found my tutorials useful to you.
If you want to find out more about Cath, please visit her website.
If you found this article useful, you might want to take a look at:
Comments